The fast Stryker project is still on-hold due to a late shipment from Hong Kong. I ordered a new 85 ampere ESC last week to use for the motor testing, but it hasn't arrived yet due to the Chinese New Year. I received an email notification that it was boxed up, so I will probably get it by the end of the week.
I am torn right now between the 28mm and 36mm inrunners. I think I would like to keep the wing loading low, so I am starting to focus more on the 28mm motor. the only downside is the prop combination I would have to use is not as efficient as the 36mm choices. I guess it will really come down to the bench results once I get the new ESC.
Both mounts I bought from customrcparts.com are very high quality, but did require some machining to work with the Turnigy inrunners. Everything is in place to run the bench test this weekend. I know I am going to need the 85 amp ESC, as I ran a test last weekend on the 28mm motor, 4.75x4.75 APC prop, and 60 amp ESC, and acheived 50 amps @ 1/2 throttle. It was a little scarry to watch, so I am definitely looking at a remote test stand.
Tuesday, February 23, 2010
Wednesday, February 3, 2010
Hiatus
I will be going on vacation later this week, and won't be back in town until the 13th. That will leave me with approximately 2 weeks to finish up the Stryker before the competition. The tasks remaining are as follows:
- Determine prop - motor - ESC - battery combination: I have a few test to run regarding the best power output and prop combination. The props I plan on testing range from 4x2 to 7x5. The motors I have to test are a Grayson Super Mega Jet, Turnigy 28mm inrunner (3200 kv), and Turnigy 35mm inrunner (1700 kv). The batteries range from 3S to 5S, 20C to 40C, and 2200 mAh to 3000 mAh.
- Mount motor
- Cut out battery box
- Paint airframe
- Reinforce elevons
- Install elevons
- Install horizontal stabilizers
- Setup electronics
Tuesday, February 2, 2010
Hot Glassed Stryker
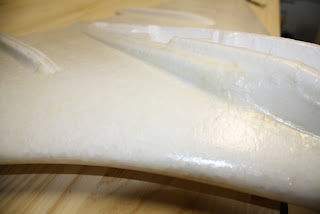
I finished the fiberglass reinforcement of the Stryker airframe. I have to say that I am very happy with the final product. As described in my previous post, I used a 3/4 ounce glass fiber fabric along with a waterborne polyurethane. The first coating was watered down to saturate the fabric, while keeping the urethane from drying too quickly. I then added a second coat of WBPU mixed with baby powder (talc). I have read that by mixing the talc with the WBPU you fill the voids in the fiber resulting in a smooth - light weight finish. After the second coating I sanded the surface smooth. The texture of the fabric was beginning to dissappear. I recoated and sanded 2 more times for a total of 4 light coats. The resultant frame is solid and extremely smooth. Here is a closeup along with some of the other pictures I promised.
Final surface ready for paint.
Filling post shaping
Glassing bottom
Final surface ready for paint.
Shaping the foam
Foam cutting for spar
Spar gluing
Filling post shaping
Filling elevon tabs
Glassing bottom
Subscribe to:
Comments (Atom)


